I connected the JS220 to my IOT device and I try to analyze the power consumption values of the device in various specific different states (i.e. sleeping, receiving, transmitting etc.) as well as over time.
I can see the current values running on the waveform screen but I did not find the right way to use the UI in order to collect and calculate the accumulated consumption over time.
Please advise,
Thanks
Hi @egoltzman and welcome to the Joulescope forum!
I think the first step is to better define what you want to measure. You typically want to measure either charge or energy. If your target device uses a linear regulator, such as an LDO, then it drops voltage to maintain current. In this case, charge, the integral of current is the most appropriate. If you use a switching regulator, then it preserves power (voltage * current). You then care about the integral of power which is energy.
The SI units are:
- current: amperes (A)
- charge: coulomb (C)
- power: watt (W)
- energy: joule (J)
The Joulescope UI displays both charge and energy in many ways. When you first open the Joulescope UI, you see the Multimeter view with the Multimeter widget:
You can clear these accumulators using Tools → Clear Accumulators.
For historical reasons, some people (especially battery manufacturers) work in customary units Ah and Wh. You can configure the Joulescope UI to use these if you want:
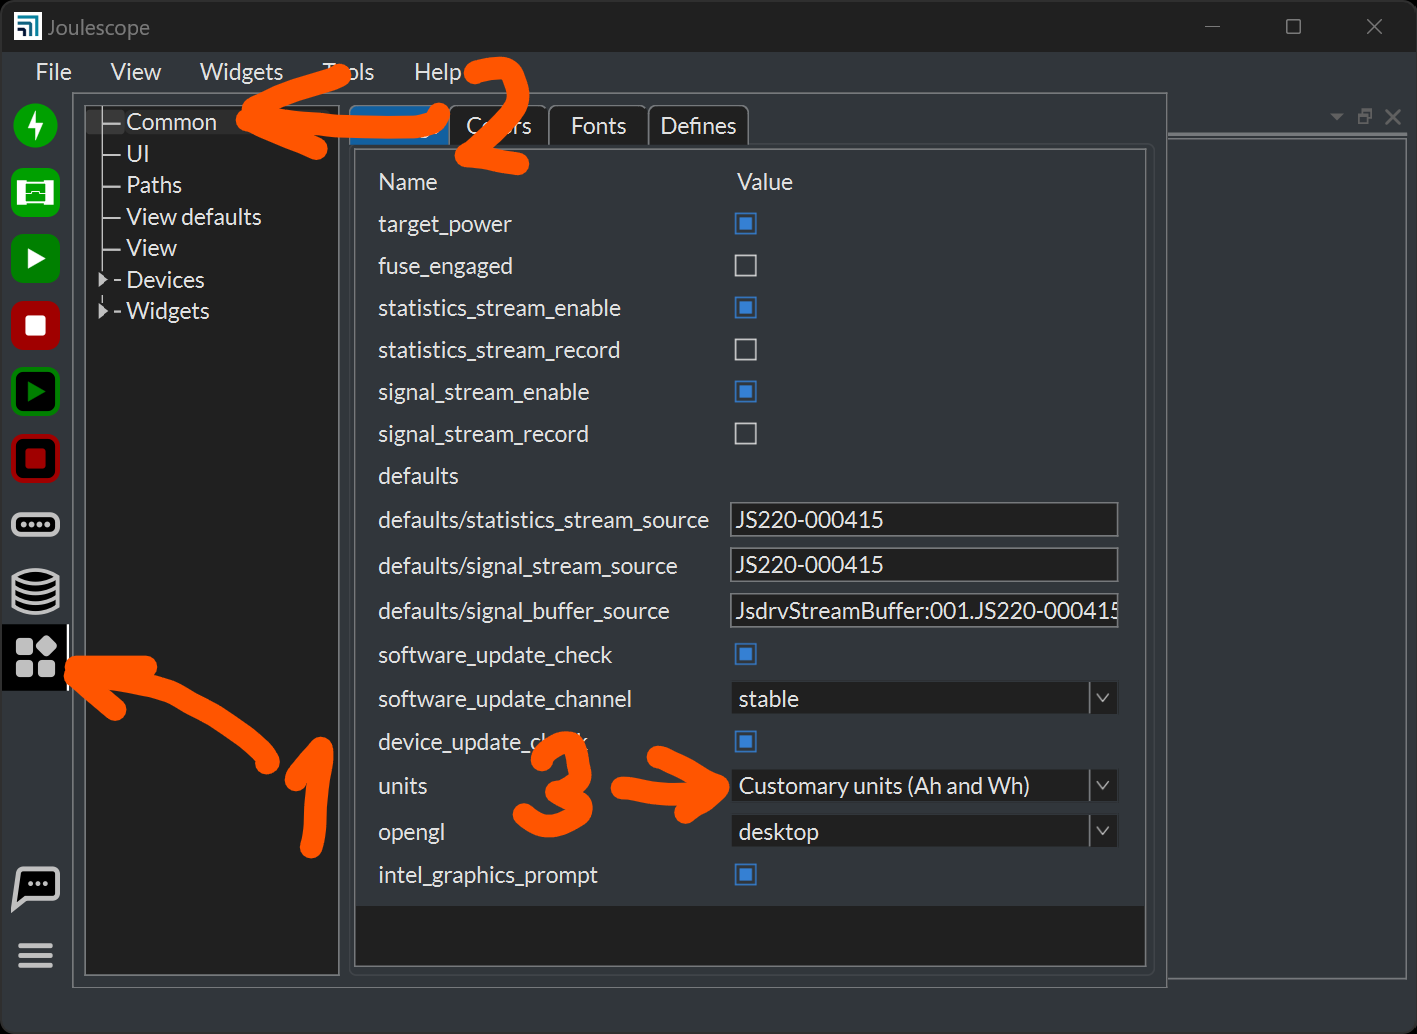
Unfortunately, you may run into issue #280, which only allows you to use this drop-down once. While we are working with Qt to fix this problem, you can add a separate Settings widget using Widgets → Settings to work around this in the meantime.
If you want to measure the charge or energy consumed by some event, you likely want to use the Oscilloscope view with the Waveform widget. One common approach is to capture the event you want, then press the Signal sample streaming button to pause the capture. Right-click on the area of interest and select Annotations → Vertical → Dual markers. Note that you can save some clicks if your right-click on the x-axis. Then drag the markers to your region of interest, like this:
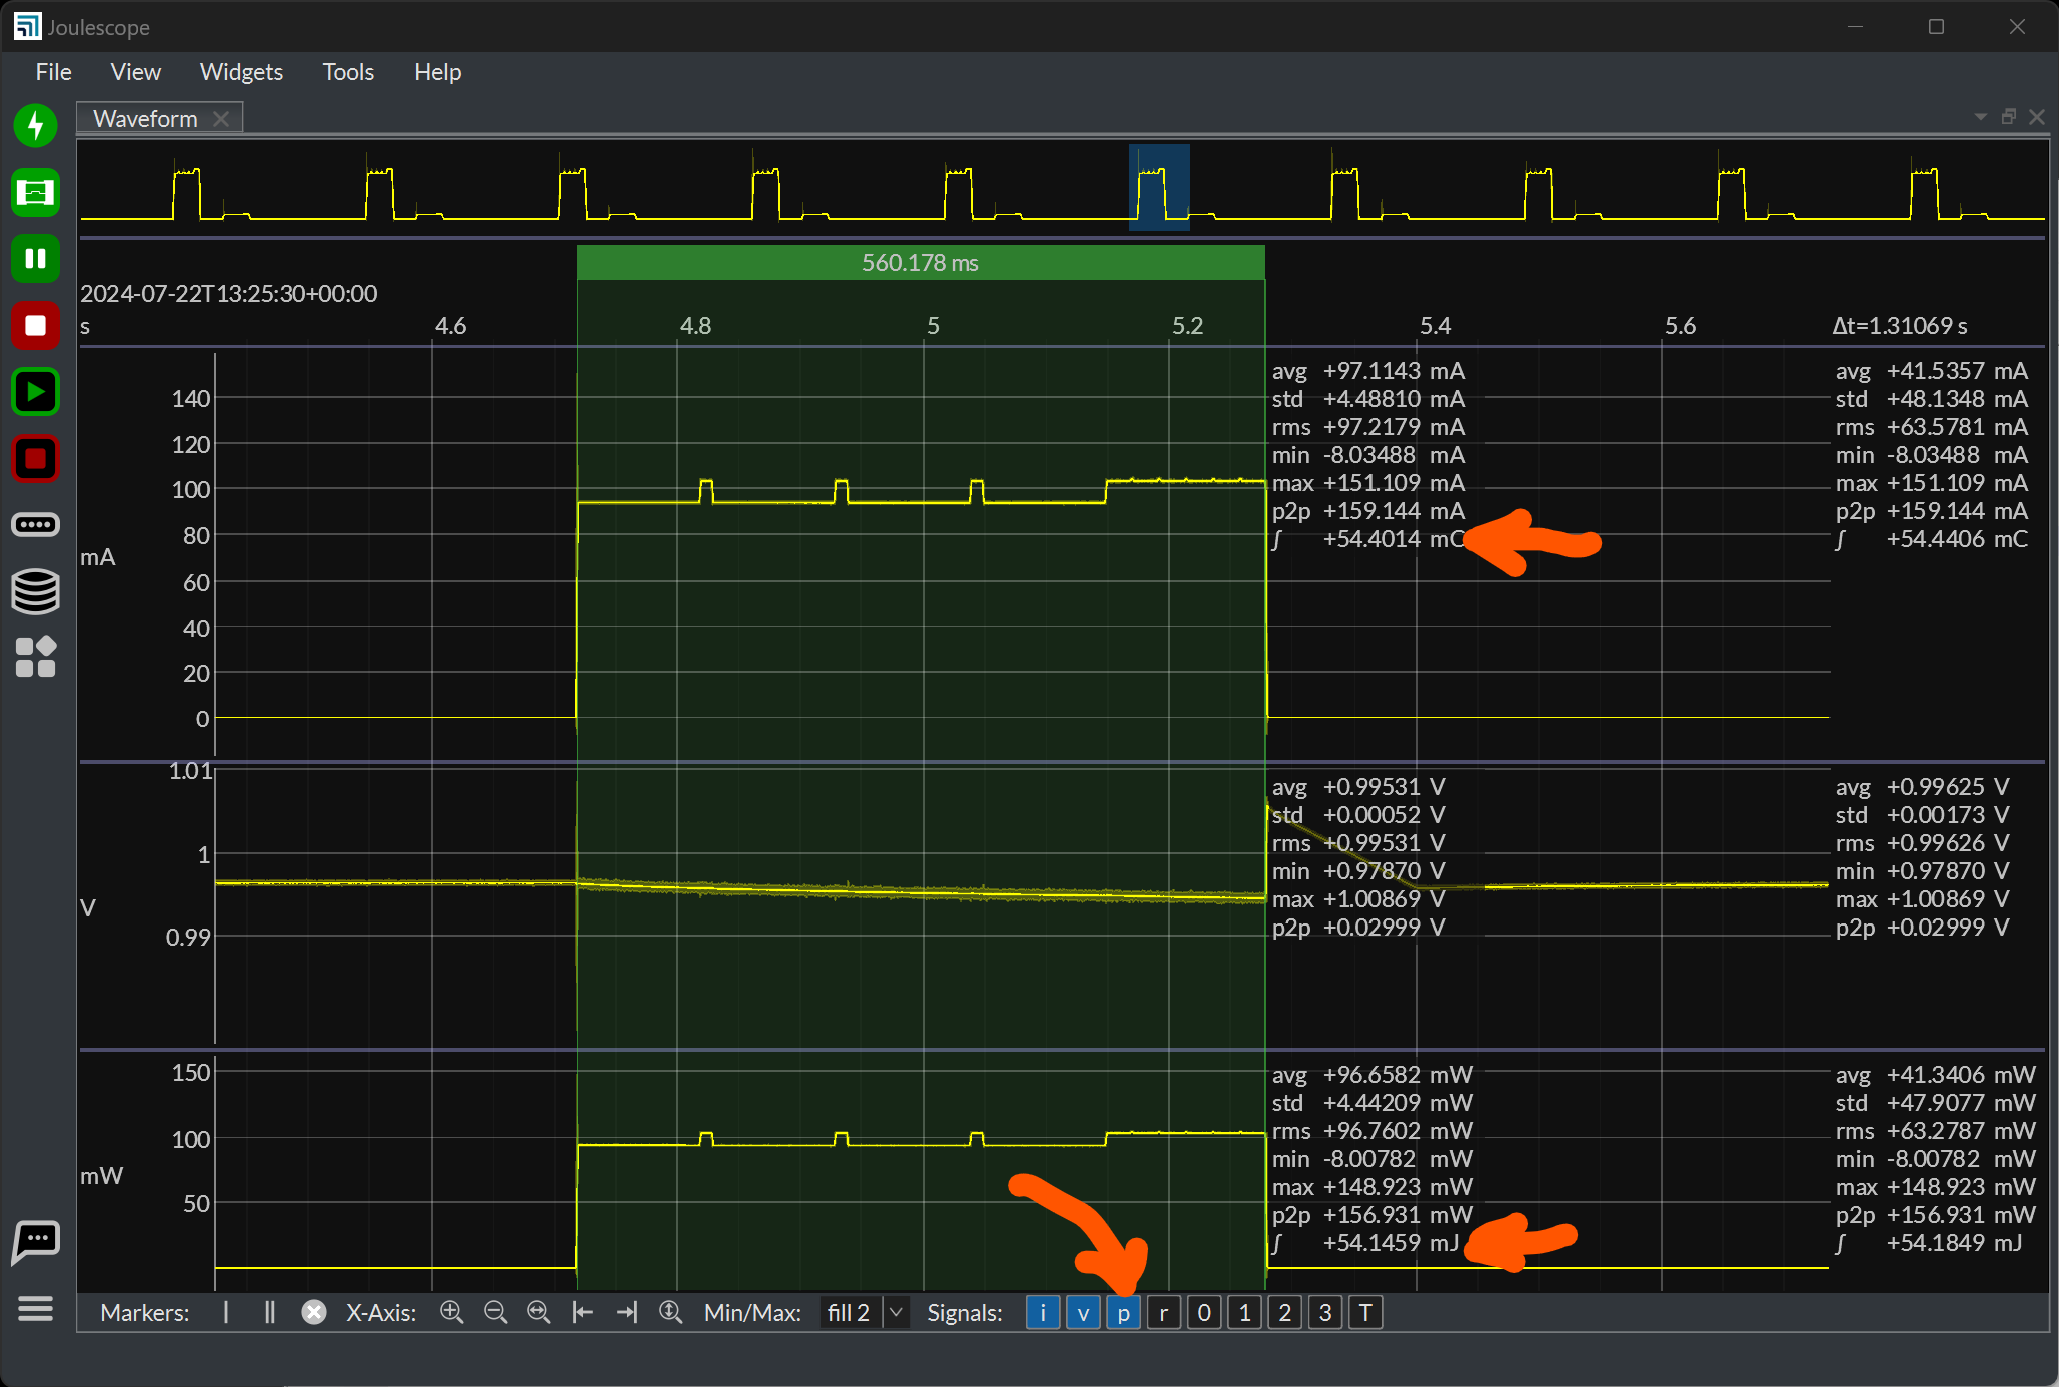
Note that the Waveform widget only shows current (i) and voltage (v) by default. You need to enable the power (p) waveform if you care about energy.
People have lots of opinions about how to estimate battery life. Depending upon your level of sophistication, you may want to account for loss of capacity over temperature and self-discharge. Here is a very simple spreadsheet that may help you get started.
Does this answer your questions? Are you able to get up and running with estimating your IoT Device’s charge and/or energy consumption?
Thank you very much Matt for this detailed answer!
I’m using LDO so I’ll go with the charge.
I’ll work with the JS220 as you suggested and will be in touch here if any more questions will arise.
Thanks!
1 Like
Hello,
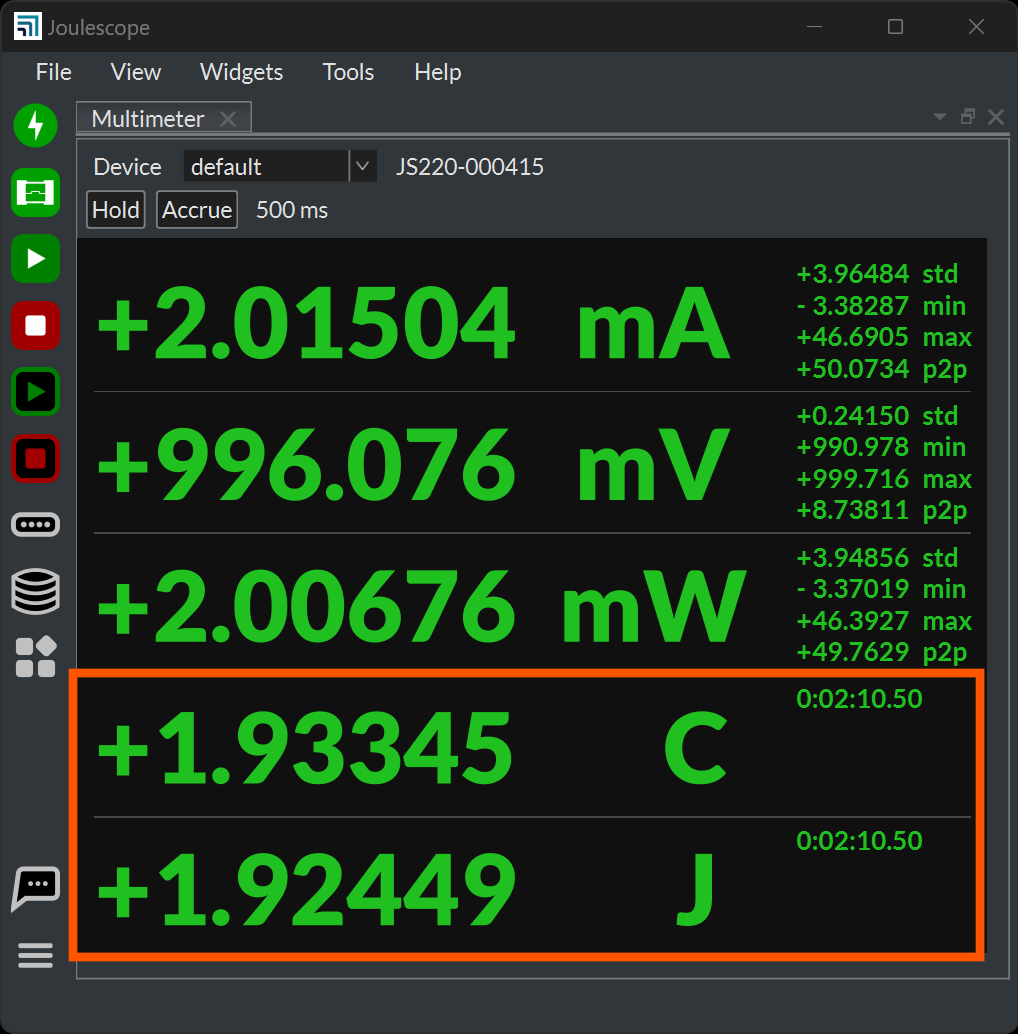
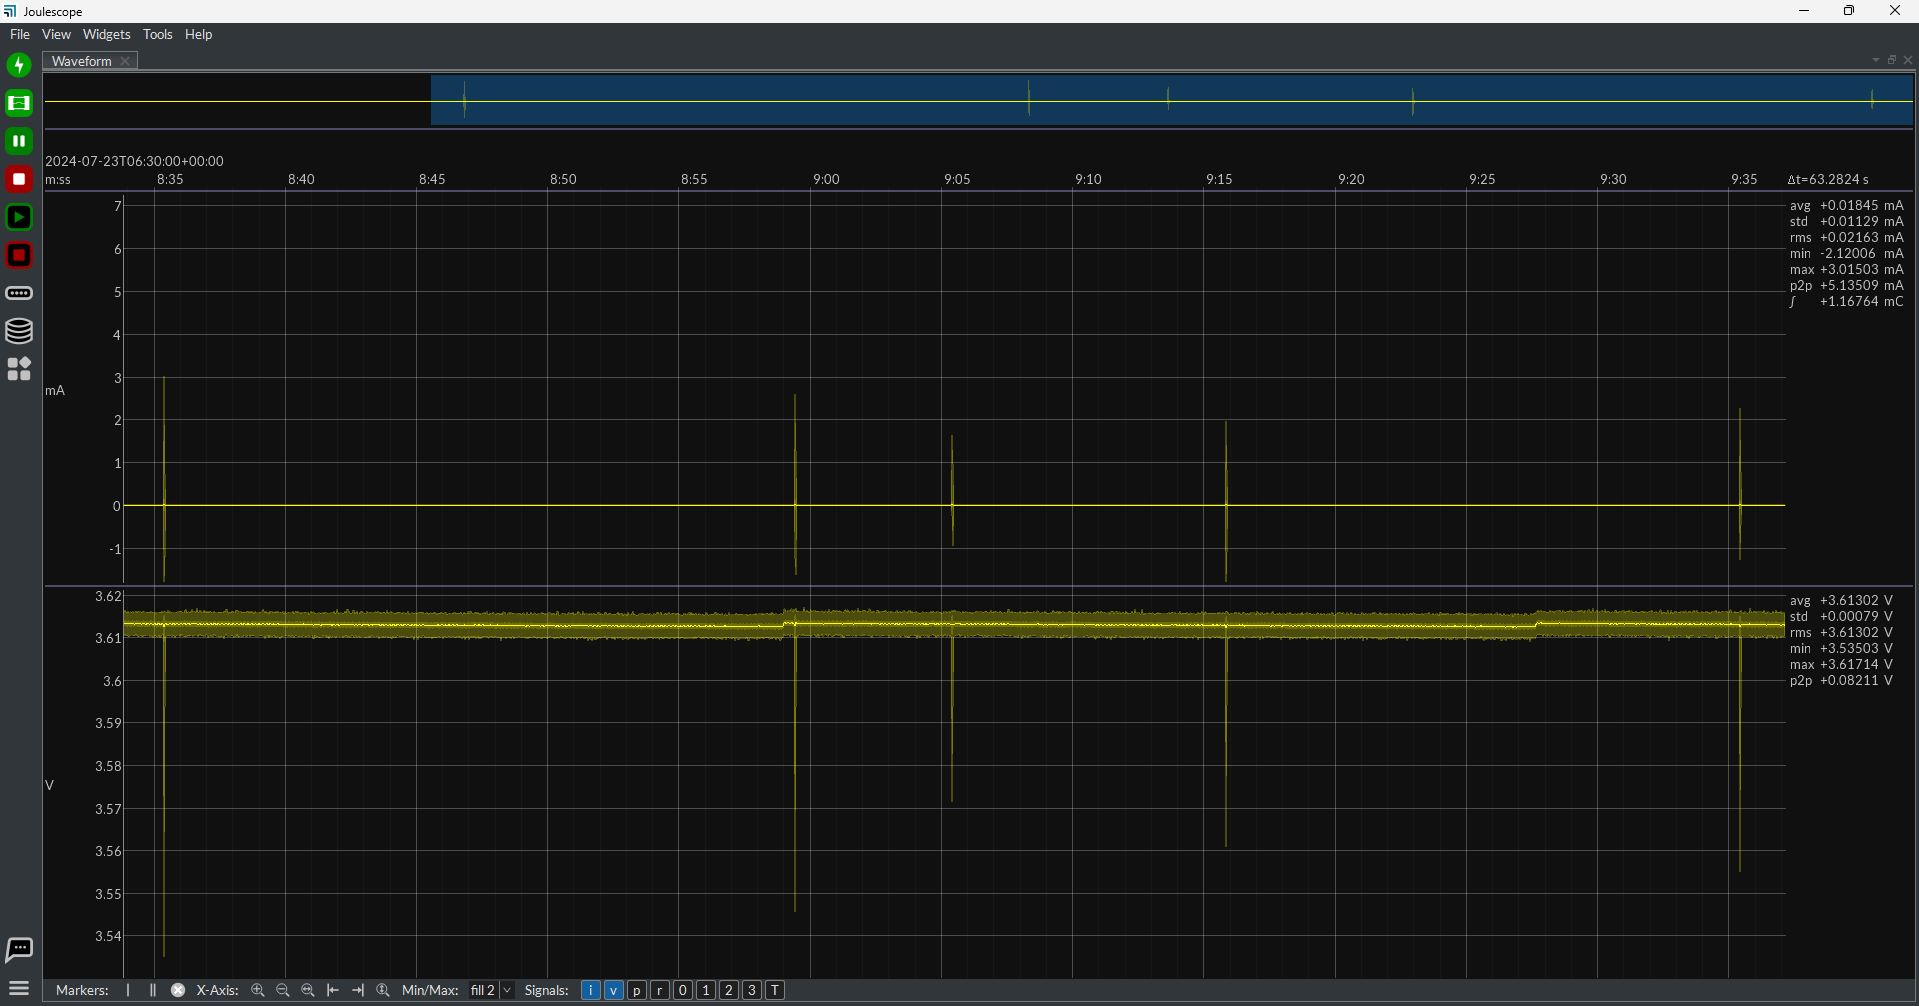
Based on the above instructions I run a test on my device and I got the below output.
I want to make sure if I read the data correctly, I see that the average current consumption is around 18uA and on the last 63 seconds the charge is 1.16mC (That is the integral of the current on this delta time of 63 sec).
So if my battery is 2,500 mAh I can run with it for (2500X63)/1.16 = 135,775 hours (~15years), yes?
Of course this is rough estimation that doesn’t take temperature and other effects.
Hi @egoltzman, Yes, your calculation is correct for battery life. Most batteries do not have 15 year shelf-lives due to self-discharge. Once you factor in self-discharge, you are likely much less than 15 years.
It looks like those events may be very short. Given the low average current, the increased measurement inaccuracies when your JS220 autoranges may matter to this measurement. Here are some things you can do to improve measurement accuracy:
-
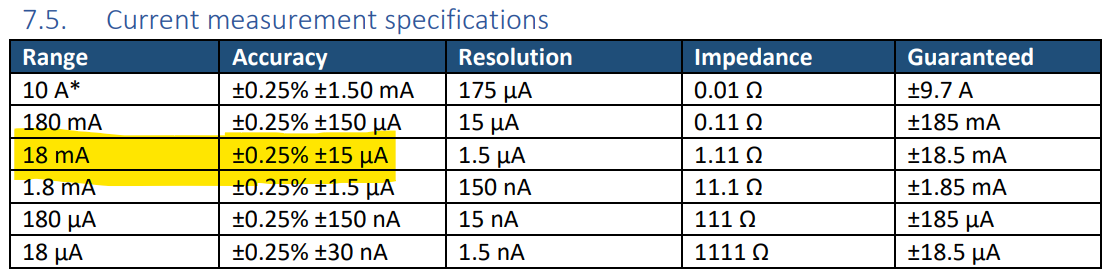
Set the JS220 for a fixed 18 mA range, which is the smallest range larger that what you measure. Here is the spec:
You can perform a current range offset calibration (press the “Calibrate” button on the Device Control widget) for better accuracy. Then, zoom in on one of these events. If they are shorter than 100 µs or so, may need to do some additional work to ensure that the measurement error is low enough for your desired measurement accuracy. I am happy to take a closer look if you want to share a picture of an event or a short JLS file. -
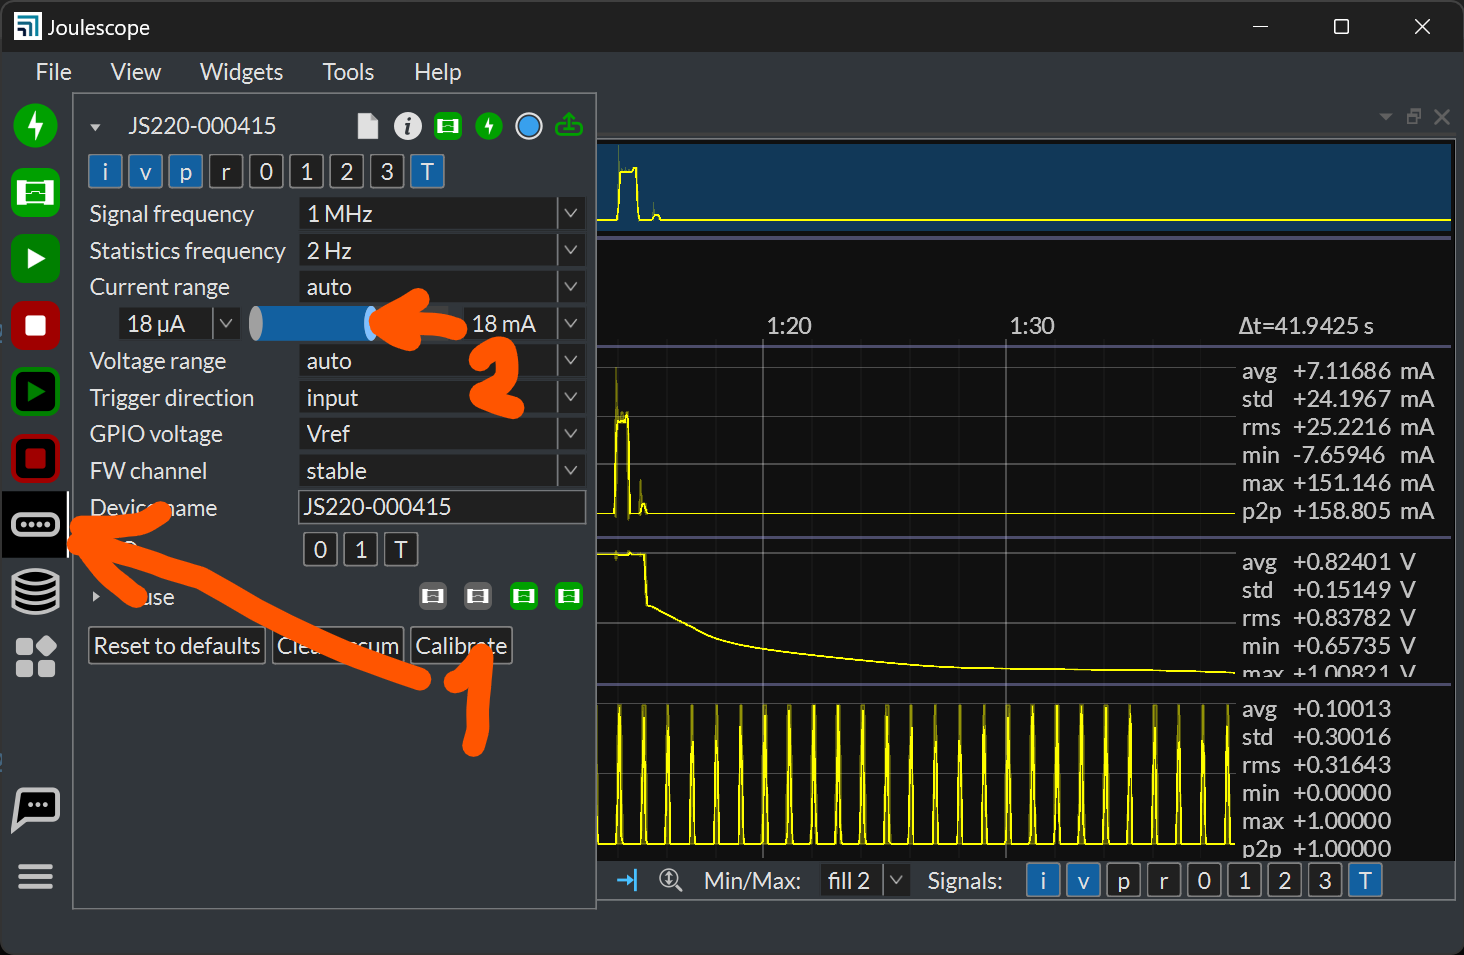
Bound the JS220 autoranging. The JS220 normally autoranges to the 10 A range. Even though it spends very little time here, the ±1.5 mA can be significant for average currents this low and events this frequently. You can constrain the current ranging like this:
-
You can display the current range. Select r in the Device Widget and on the Waveform widget. This gives you greater visibility in what your Joulescope is doing and the measurement error.